
A Brico Dépôt kit carport can be assembled in a weekend by two people, provided that the ground preparation is not rushed. Most installation failures do not stem from the assembly itself, but from undersized anchoring or a lack of knowledge about local urban planning constraints. Here, we detail the technical points to master before taking out the screwdriver.
Ground anchoring of a kit carport: plates, concrete blocks, and wind resistance
The instructions provided with a Brico Dépôt carport generally foresee a fixation by metal plates anchored on a concrete slab. On paper, this is sufficient. In practice, feedback from experts after the storms of 2022 and 2023 shows a marked increase in claims involving poorly anchored or improperly installed kit carports.
See also : The best methods to easily convert a Pages file to PDF
In windy areas or on soft ground, simply anchoring to a slab does not hold. We systematically recommend buried concrete blocks with reinforced metal fixings, even if the kit does not include them. Pouring four to six square-section blocks, buried to a depth of at least fifty centimeters, radically changes the stability of the structure.
Before pouring anything, check the nature of your soil. Clay soil expands and contracts with the seasons: plates placed on the surface eventually shift, and the posts become misaligned. Sandy soil drains well but offers little resistance to pulling. In both cases, buried anchoring compensates for the weaknesses of the ground.
See also : How to Properly Install a Wooden Partition?
For those wishing to install a Brico Dépôt carport on an existing slab, it is essential to check its thickness and reinforcement. A standard terrace slab, often poured without welded mesh, is not designed to withstand the pulling forces of a carport exposed to the wind.
Preliminary declaration or building permit: the trap of requalification as construction
A carport sold as a “removable shelter” is not necessarily considered as such by your local council. In recent years, many municipalities have requalified attached or solidly anchored carports as true lightweight constructions, with all the obligations that come with it.
The basic rule is related to the footprint. Below five square meters, no formalities are required. Between five and twenty square meters, a preliminary declaration of works is sufficient in most cases. Beyond twenty square meters, a building permit becomes mandatory.
The problem is that a simple carport for one car almost always exceeds five square meters. A standard model of three meters by five reaches a footprint of fifteen square meters. Therefore, the preliminary declaration is the most common procedure.
- Check the Local Urban Planning Plan (PLU) of your municipality: some areas impose specific materials or colors for structures visible from public roads.
- Classified sectors or those near a historical monument require the opinion of the Architect of the Buildings of France, which extends the processing time from one to several months.
- A carport attached to the facade alters the external appearance of the building: even below twenty square meters, the municipality may require additional documentation.
Never start work before receiving the non-opposition decree. A compliance check after a neighbor’s complaint can lead to a demolition order, and such cases are increasing.
Choice of covering and height under post: technical trade-offs
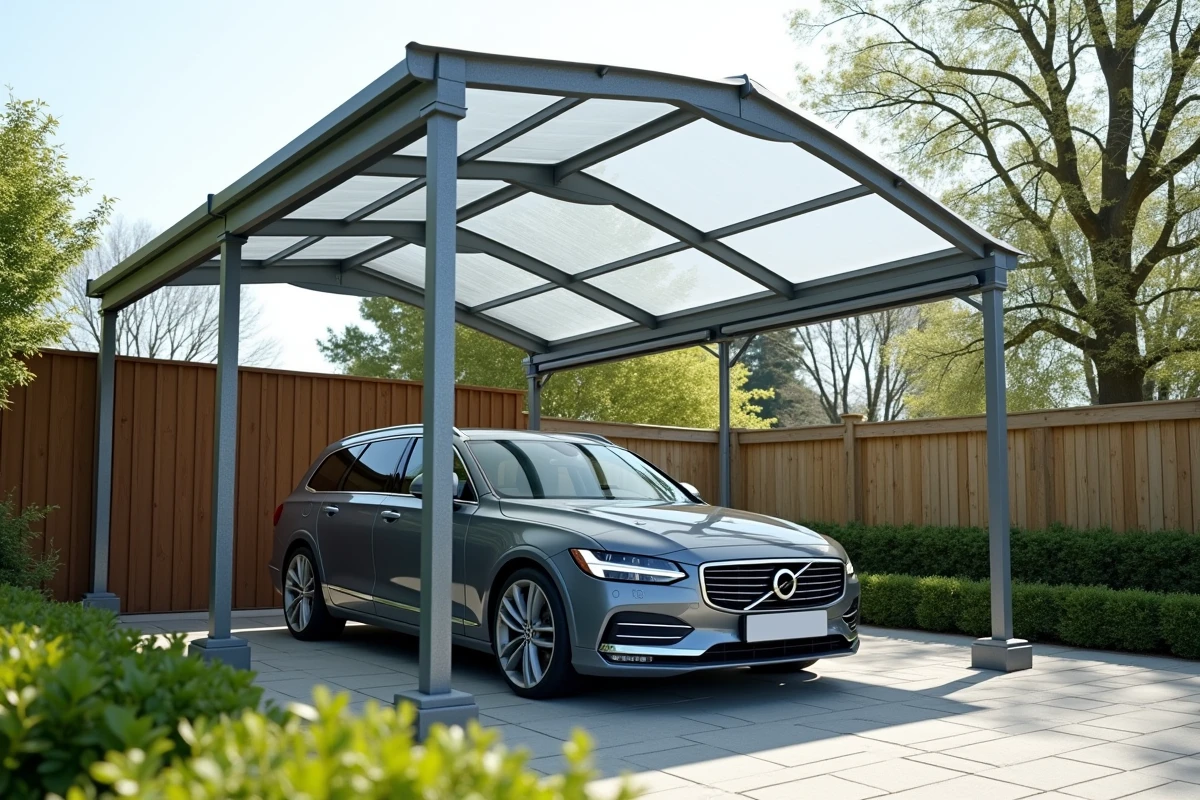
The Brico Dépôt kits mainly offer two types of covering: cellular polycarbonate and steel sheet. Polycarbonate allows light to pass through but ages poorly under UV rays after a few years if the anti-UV treatment is low quality. Steel sheet lasts better over time but amplifies the sound of rain and heats up more in summer.

For a vehicle like an SUV or utility, we recommend a minimum height under the post of 2.20 meters. Entry-level kits sometimes show reduced useful heights once the roof slope is taken into account. Measure your vehicle with the trunk open before finalizing your choice.
The roof slope also deserves attention. A slope that is too low accumulates stagnant water and dead leaves, which accelerates the corrosion of the fixings and increases the load on the structure. An inclination of at least ten degrees facilitates natural drainage. Plan for a gutter and a connection to a drain or water collector to prevent erosion at the base of the posts.
Tools and assembly sequence for a Brico Dépôt carport
Assembling with two people is realistic if you follow a precise order. Most assembly errors come from premature final tightening: all screws and bolts should remain loose until the entire structure is in place and level.
- Construction level (minimum length one meter), essential for checking the verticality of the posts on two axes.
- Ratchet wrench with sockets suitable for the kit’s bolts, faster and more reliable than a flat wrench.
- Drill-driver with concrete bits if you need to drill a slab, and a set of wood bits for pilot holes on the framing pieces.
- Clamps to hold the beams in position while you bolt, freeing up the second person to check the measurements.
Start by placing all the posts and checking their verticality. Then mount the top beams without tightening. Check the diagonals before any final tightening: a few centimeters of gap at the bottom results in a much more visible offset at the roof. Once the square structure is confirmed, tighten progressively in a star pattern, like for a car wheel.
The covering is installed last. Work in calm weather, as a polycarbonate or sheet panel caught by the wind becomes dangerous. Secure each panel with the provided EPDM joint screws, without over-tightening to avoid crushing the sealing joint.
A properly assembled and anchored carport protects a vehicle for many years without major intervention. The only regular maintenance consists of checking the tightness of the bolts once a year, after the windy season, and cleaning the covering to maintain water drainage.